Showing posts with label tutorial. Show all posts

Friday, May 30, 2014

Mid-Month Tutorial #5: Zakka Life's Miniature Colored Pencils

Sorry for the lack of posting this month, guys!
Life got super crazy, so I had to pause!


I figure I'll start back up next month with the Friday Favorites...
but I really love the Mid-Month Tutorials... and even though it's half a month late,
I still wanted to get it in before the month ended!!


Tutorial #5 is Zakka Life's Miniature Colored Pencil tutorial!
It's easy, cheap, not a huge investment of time and yields great results!

**NOTE**
These pencils don't actually write, they're just for show.

Please see the original tutorial here:

Supplies:

1. Round Toothpicks
2. Scissors
3. Markers
4. Sandpaper
5. (Optional) Mod Podge

••••••••••••••••••••••••••••••••••••••••••••••••••••••
Let's begin!
Step 1:
Take a single toothpick from the box and decide how long you'll want your colored pencil to be.
Zakka Life's instructions say to cut the toothpick in half... but for me, that would have been too long, proportionally, so my toothpicks are about 1.125 inches long.
A little less than half a toothpick.


TIP:

Step 2:
Sand the end of your pencil so that it's nice and rounded.
I used 220 Very Fine 3M sandpaper.
 I didn't even have to take it out of the package to use it XD

Step 3:
Now it's time for coloring!
**IMPORTANT**
Do NOT handle your dolls while you're coloring these... you *will* get marker on your fingers,
unless you wear gloves... and it could be unintentionally transferred to your dolls, or their clothes.
I color the pencil tip first... and to color it, I just dab the marker against the toothpick tip... because toothpicks are made from a soft wood, they absorb the ink, and it spreads a little... so don't get overzealous right away with the ink application.

Then again... if you do... it's just a toothpick... there are plenty more to try again on!

Next I color the body of the pencil:
 
 
Step 4:
Let the markers dry for 24 hours.
(This is not a step in Zakka Life's instructions... but I'd rather be safe than sorry!)
 
Step 5:
(optional)
Let's take a minute to discuss dolls and markers.

Bottom line?
They don't mix.

I've seen many a doll ruined with Sharpie markers... some intentionally, some, not so much so.

After I made these colored pencils, I let them dry for 24 hours,
then I took the darkest one and rubbed it against my doll's skin.
 

Light rubbing was fine, no color transfer,
but harder rubbing (like if you were going to shove it into the doll's hand between fingers)
yielded color transfer.

I wiped it off right away, and it all came off... but it still worries me that if you left a pencil in a doll's hand, color transfer would happen over time.

My solution?
Coat the pencils in Mod Podge to seal the color in.
Glossy or Matte, your choice.

Conclusion:
I LOVE this tutorial... there is something so satisfying about coloring these pencils and seeing them come to life.


Wednesday, April 16, 2014

Mid-Month Tutorial #4: Flower _'s Paint Chip Box Tutorial

Christie: Hi everyone! I'm back with a new tutorial for you!


This one is pretty easy!


Supplies:

1. Scissors
2. exacto knife
3. Behr Paint Swatches
4. paper glue (I used Aleene's Tacky Glue)
5. ruler
6. Pencil

••••••••••••••••••••••••••••••••••••••••••••••••••••••
Let's begin!

Step 1:
Choose your Behr Paint Swatches in the colors you want the box to be.
You will need 2 swatches to make a box, one for the box, and one for the box lid.
You can pick these swatches up for free at your local hardware or paint store.

The swatches measure 5X6 inches.

For your box bottom, you will need to cut out a 5X5 inch square.

For your box top, you will need to cut out a 3X3 inch square.

Step 2:
When measuring your box bottom, it's wise to make sure you're not cutting on the curved edge.


Step 3:
Once you have your 5X5 inch box measured out, cut it out with scissors.
(You can also use a ruler and exacto knife, but it's not necessary to be that precise)
Christie: Human sized scissors suck...

Step 4:
Now it's time to cut out the 3X3 box top.
I like to make two lines (like you see below) and then measure from there...

Step 5:
Here is where the instructions are a little vague...
 
The next step is to draw the lines for where you'll cut the flaps and make the folds...
and the tutorial measurements say:
 
For the 5X5 box bottom:
Measure in "a tad over 1.5 inches"
... well...
ok?
So, here is what I chose for my "a tad" measurement.
You can see the pencil mark falls between the 5 (which marks 1.5 inches) and the 6.
My "a tad" is very small.

In the end, your Box Bottom swatch should look like this:
(divided into 9 boxes)

For the 3X3 inch top:
Measure in "a tad under half an inch"
On this ruler, the 5 marks 'half an inch', and I made my pencil mark between the 4 and the 5.

In the end your Box Top swatch should look like this:
(divided into 9 sections)
Christie: Yup, looks good.

Step 6:
Next we're going to cut out the tabs!

Christie: I recommend using the Exacto knife for this next bit!

The black dots mark where I cut.
I don't measure, I just sort of roughly cut out some bits...
ONLY cut where the black dots are,
the other pencil lines are for folding along!

Also, pay attention to the fact that the notches you will be cutting out go outward,
and do not cut into the middle box on the top and bottom rows.

In the end you will cut out tabs like this:

Do the same on the box lid (but obviously, the notches will be much smaller!)
Again... I just eye-balled it:


Step 7:
Now I use the ruler to help me fold along the pencil lines!
Fold along all the pencil lines!


Step 8:
Now it's time for GLUE!


The tiny tabs that you created by cutting out the notches on the box top will be glued to the inside, so fold them inward...

And then glue them!
 

On the box bottom, the tabs aren't quite as tiny, but you still glue them inward,
they will just overlap.
 

To have a nice box, it is very important to make sure the top edges all line up evenly!
 

This picture illustrates where I put the glue!

FINISHED!!
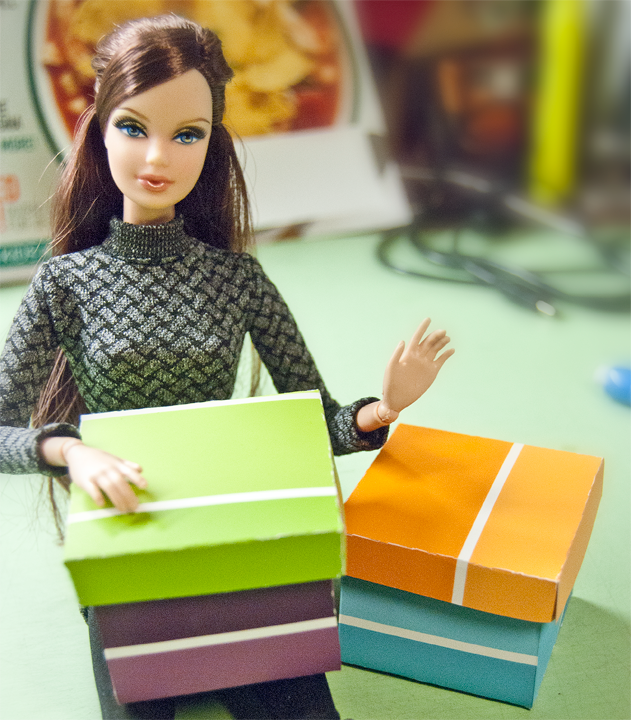
You have some cute, multicolored little storage boxes!
Christie: These would look great in any girl's house!

Conclusion:
This was a pretty great, simple, cheap tutorial!
I suggest everyone try it out!

Wednesday, January 15, 2014

Mid-Month Tutorial: Jointed Love's bunting tutorial

Christie here, with a new feature here on The Traveling Twig!

Each month, around mid-month, I will be trying out a tutorial I've seen online,
and letting you know whether I think it's a tutorial worth sharing or not!
Tutorial #1 will be Jointed Love's bunting tutorial!

Supplies:
1. Scissors
2. String or Twine of some sort
3. Washi Tape


When it comes to Washi Tape (a fancy Japanese masking tape),
Jointed Love recommended ordering from Chickydoddle on Etsy:

I have to say... I am very tempted to spend a lot of money there, haha!
BUT! For those in the USA, you can find Washi Tape in your local stores too...
All of the Washi Tape you see below, I found at local stores (from craft stores to grocery stores).
Scotch Tape started making their own... so it's out there!


Step 1:
Cut off strips of tape to be the bunting flags.
Make sure that the tape is twice as long as you want the flag to be
(since you will be folding it over the string)


Step 2:
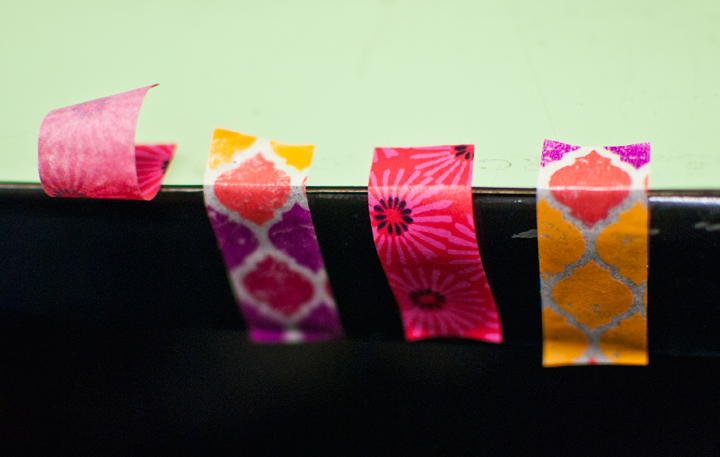
You can pre-cut your flags and line them up along a table edge...
I did this for the first 5... but since I was making a 19 inch bunting, I gave up and just cut them as I needed them after that... lol!


Step 3:
 Add the tape to the string.
Do this one piece of tape at at a time.
 
I gently pressed one edge of the tape to the table,
then positioned the string, then folded the tape around the string.
Before folding over the string.
After folding over the string.

Step 4:
Repeat Step 3 until you have filled up the string with as many flags as you would like.


Step 5:
Once you have all of your pieces of tape on the string,
it's time to cut them down into flag shape!


I cut them from the string to the point of the flag...
I find it easier to make the flag an even triangle this way.


The way I do it, being right handed, is I cut the right side first,
then I turn the flag around so that I'm cutting it from the base (near the string) to the point,
again on the right side. I just have more control this way!


Step 6:
Repeat Step 5 until you have done all of the pieces of tape!
THE END! XD


Trouble Shooting:
There's more!
There were a few little things that could have gone smoother
when I was making my bunting for the first time.


Problem 1:
The flags are all over the place! 0_0
Some were pointed up, some down... 
as I would put them on, the string would twist,
so not all the flags were "hanging downward"by the end.

In Jointed Love's tutorial, she says she taped her string to the table, but that it was an optional step.
I disagree! I think if I'd taped the string down it would have prevented all that twisting that made my flags all wonky!!

So, my advice?


Make sure the string isn't moving when you're pressing your flags into place.


When you're done, they should all be hanging downward in the same direction!

Problem 2:
 The tape doesn't line up!
This is something that might freak you out when it happens,
but really it isn't a problem at all!
Just so long as the tape touches evenly at the base near the string,
this issue is a non-issue.


 •••••••••••••••••••••••••••••••••••••••••••••••••••••••••

Conclusion:
I loved this simple tutorial!
It was easy to figure out and follow!
I absolutely recommend it!!!!